With this additional module you can upload your project photos to the main database. Please note, that in order to use this module you need XTSyncServer and Xpert-Timer Pro for Windows.
As soon as you've purchased the In-App, you need to activate the feature in your main settings of Xpert-Timer Mobile.

After you've activated the photo upload function, you'll see a small photo icon on your main screen:

Click on the button to activate your camera. A project needs to run, in order to be able to use the camera button, as the photo is linked to the active project. Take a picture and save the picture.
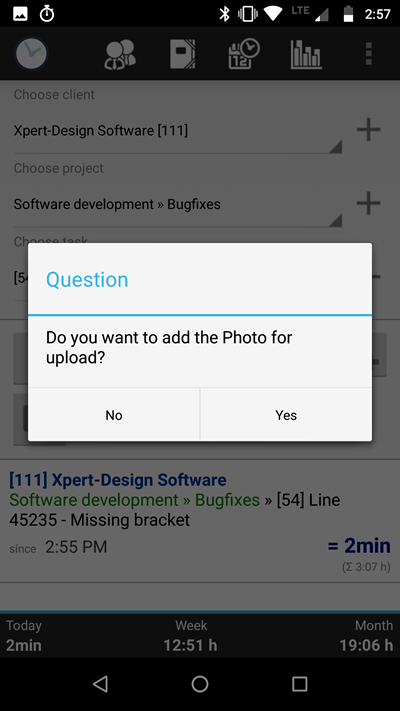
In the general settings of Xpert-Timer Mobile, you can decide, whether you want to save the photos for upload immediately, of if you want to be asked before you save them for uploading. Depending on the setting you chose, you'll see a dialog on your screen:
All your photos will be saved in connection to a project.
So after synchronizing with the main database, you'll find your photos in the document management of your project in Xpert-Timer Pro. In case you want to delete some photos before uploading, you can find them on your SD card in the folder "xperttimer" -> Uploads.
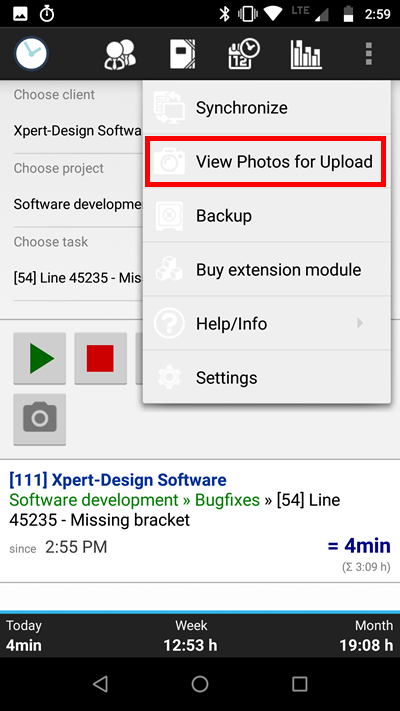
In the menu, you find the menu option "View Photos for Upload". There you can double check the photos edit them if necessary.

Once you've synchronized all your photos, you can find them in your "Documents" folder in your project settings in Xpert-Timer Pro, or open the general document management in Xpert-Timer Pro.
