Before setting up the system for synchronization
Before you setup both systems to synchronize, create a backup of the recorded times in your Xpert-Timer App. Please point to the chapter "Create backup" to learn how to create a backup in the system. With this backup, you can return to the current state in case you run into problems with the synchronization.
Minimum Requirements
In order to have the two systems running the minimum you need is:
✓Xpert-Timer Mobile
✓Xpert-Timer Pro
✓Synchronization Module
✓XT SyncServer
Attention! You need the interface XTSyncServer even if you plan on using the synchronization only in your LAN without a connection to the internet. The transfer of data between the Mobile and Pro Version always requires the XTSyncServer, but not necessarily a connection through the internet. |
Important first steps
Make sure that the system time of your Android smartphone and your Windows system are exactly the same, to avoid synchronization errors.
![]()
Step by step installation
To get the two systems to communicate with each other follow these steps:
1.Install Xpert-Timer Pro on your Windows machine:
https://download.xpertdesign.de/XTInstEN.exe
2.Install XTSyncServer on a Windows machine that's running when you synchronize the data between the two systems. We suggest (for the Single User installation) to install it on the computer you are running your Xpert-Timer Pro version on. With the multi user version running, you should install XTSyncServer on a Windows Server.
https://download.xpertdesign.de/XTInstSyncserver.exe
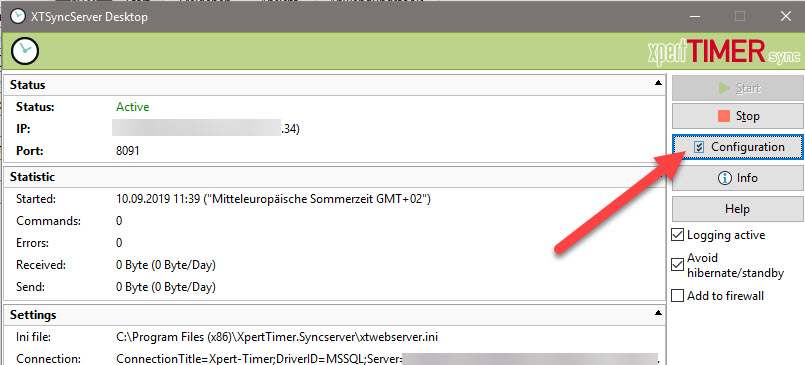
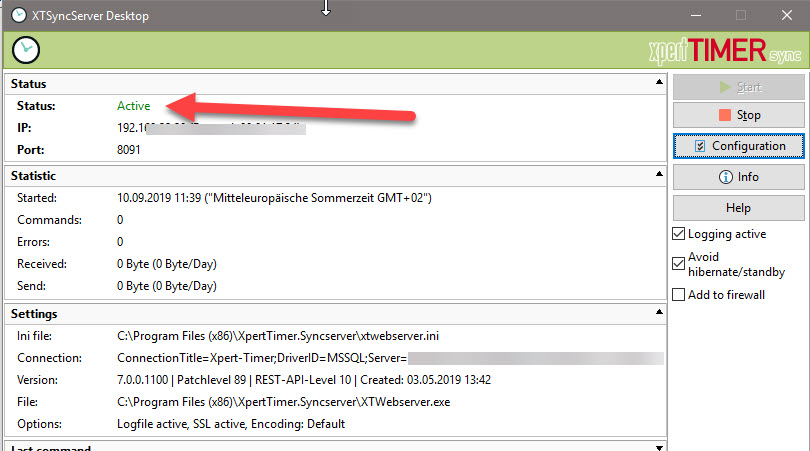
3.Start XTSyncServer.exe (XTWebserver) in your SyncServer Installation path. XTSyncServer used to be named XTWebserver, so don't get confused.
If you don't own the necessary user rights, a pop up dialog will tell you. In this case you need to restart the program with administrator rights.
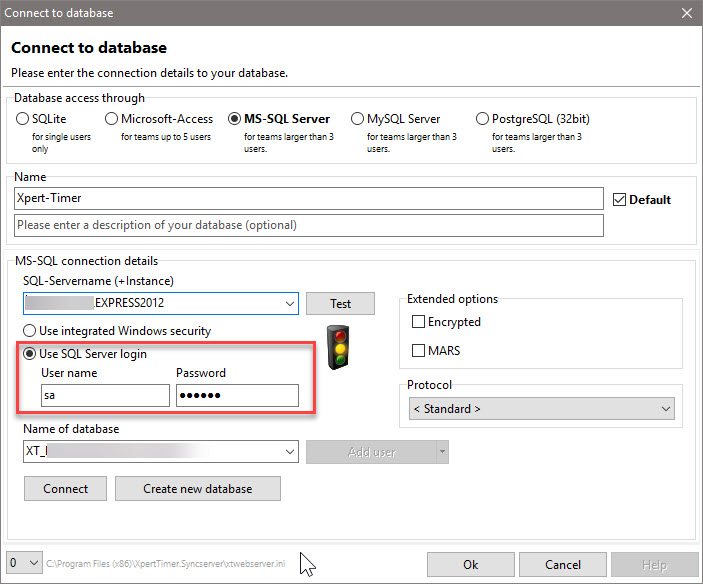
4.First you have to establish the connection between Xpert-Timer SyncServer Service and Xpert-Timers' database. To do so, please point to the configuration in XTSyncServer and choose the tab "Database". Please note, that you can only connect to your SQL Database using a user name and password (you might need to create a new user in your database). For security reasons the windows authentication will not work.

5.Then point to the tab "General" in your Xpert-Timer SyncServer Service dialog and set the connection details. You will need these connection details (login/password) for connecting your Android later. Set a strong password, so nobody can access your data. Now, test the connection. Please note, that the port of your local firewall must be open. In order to configure your firewall point to Windows -> Run / Execute -> firewall.cpl. In the settings, enter your Xpert-Timer SyncServer Service (XTSyncServerService.exe) as a trusted program.
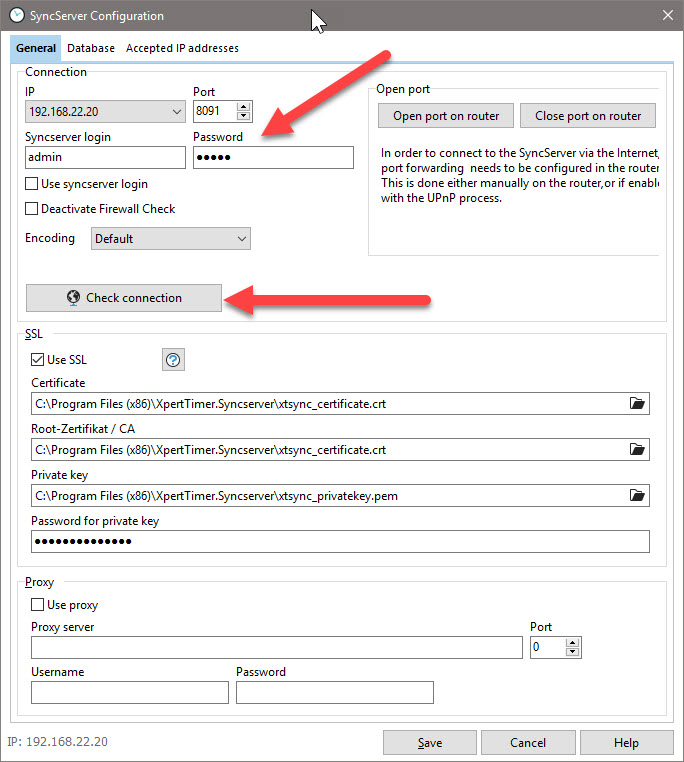
6.Save the settings and restart the service.
7.If you connect to your database through the internet, you have to open your ports in the firewall (e.g. through UPnP) and use your port forwarding to direct the requests to the correct server. Please double-check if UPnP is activated on your router.
8.FYI: If you want to check your connection to the database, you can send a command through a browser to your SyncServer, Type http://yourdomain_or_ip:port into the address line of your browser. This command should trigger an error message, which is perfectly fine and means you are accessing the database.

9. I f you got everything up and running your SyncServer service is installed.
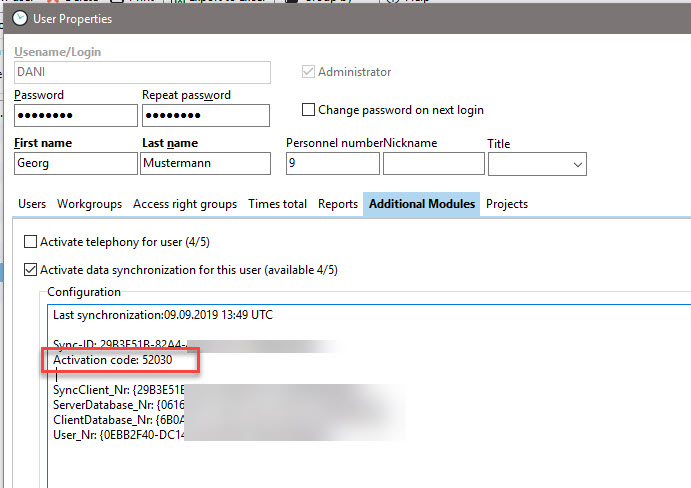
10. Open the user properties dialog -> Tab "Additional modules" and activate the synchronization. Read through the dialogs that open. Choose Android device for your synchronization. A Sync-ID and an Activation Code is created. Only the 5 digit number is necessary to establish the connection between the Pro and the Mobile version later.
11. Make sure your SyncServer is running and connected to the correct database.
12. Start your Android Xpert-Timer App.
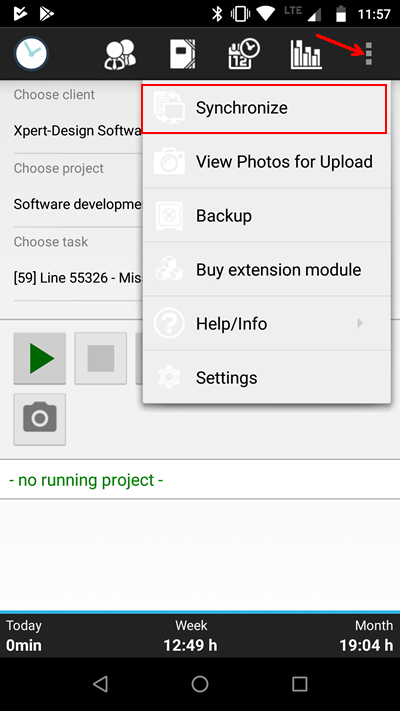
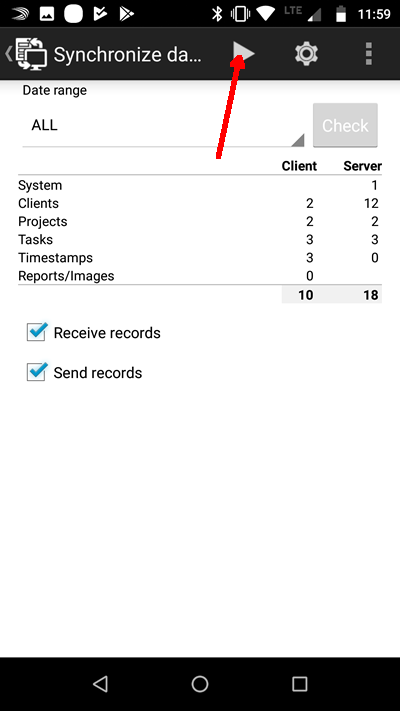
13. In the main dialog of Xpert-Timer Mobile, choose "Menu" and "Synchronize".
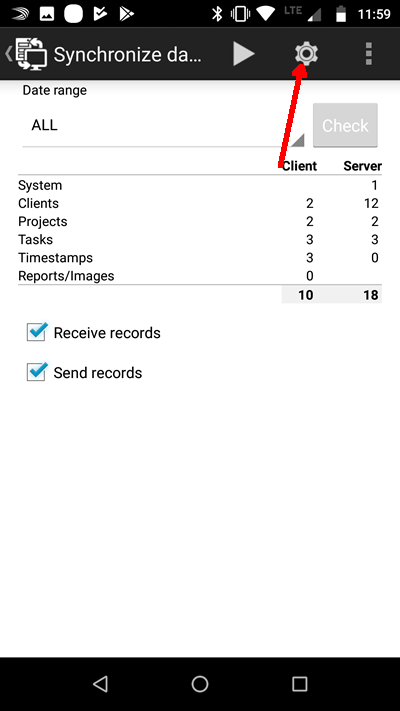
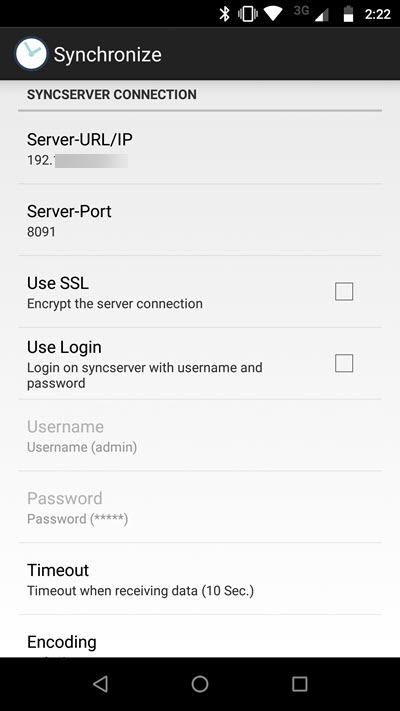
14.Open the settings to enter the connection data to your XTSyncServer.
15.Scroll down in the settings until your see the Sync-Server Connection settings. There enter all information to connect to your SyncServer. This would be the Server-URL, Server-Port, if you use SSL or not, the SyncServer login data with username and password. These are the most important settings. You should now be able to connect to your XTSyncServer.
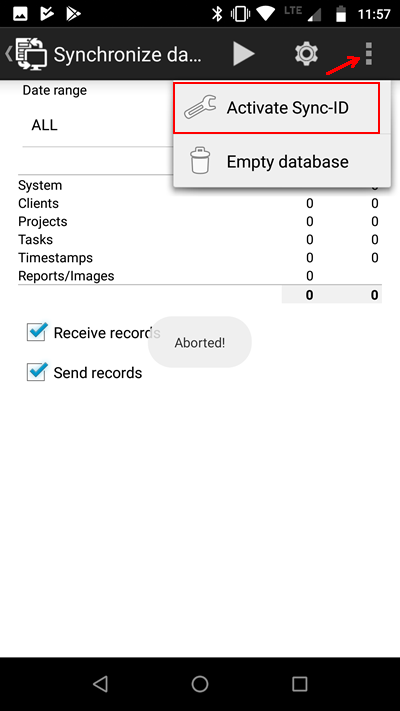
16.Now open the menu and choose "Activate Sync-ID". The Sync-ID is equal to your 5 digit Activation Code.
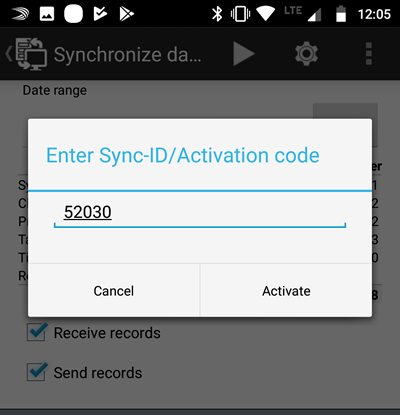
17. Enter the 5 digit Activation Code you created in your Xpert-Timer Pro.
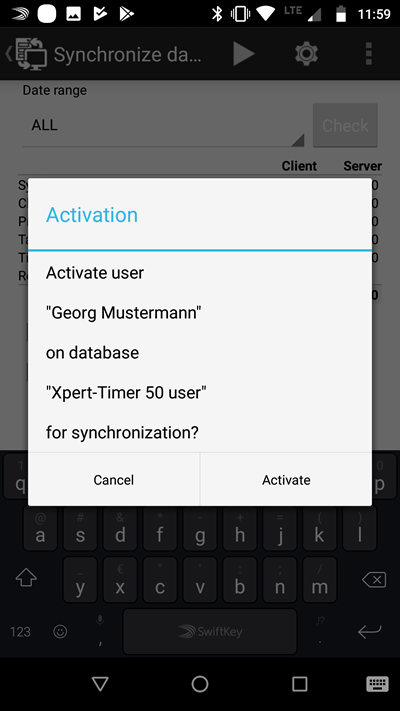
18.The connection is now set up. If you entered your data correctly and configured your SyncServer correctly, you should now be able to synchronize with your main database.
Attention
In the synchronization dialog in Xpert-Timer Mobile point to Settings to decide what data should be synchronized with Xpert-Timer Pro. Generally we suggest to only move timestamps from the mobile phone to the Xpert-Timer Pro version and to pull only projects and clients to the phone. Otherwise your phone will hold too much data and transferring the data will take too long. (Depending on your internet connection).
